

How To Make Animated Video Of Ui Design
Bringing UI designs to life with animation: Adobe XD & After Effects
Ever looked with awe at those glitchy UI stinger videos, wondering how the heck they do that? Well, I did. Turns out, it's not so difficult and all you need is an Adobe Creative Cloud license to get you started.
![]()
Note — If you don't fancy splashing out on an Adobe license, you can trial their products for 14 days each. That should give you more than enough time to play, check it out .
1. Download all the apps
You'll need to download two applications from the Adobe suite to use this method; Adobe XD and Adobe After Effects.
- Adobe XD — a vector-based graphics package aimed at the UI/UX crowd and very similar to the likes of Sketch and Figma
- Adobe After Effects — a motion-graphics package specialising in high-fidelity animation. Not to be confused with Adobe Premiere, which is primarily for stitching together footage
2. Prepare our design
You can grab a copy of the sketch file for this tutorial, here.
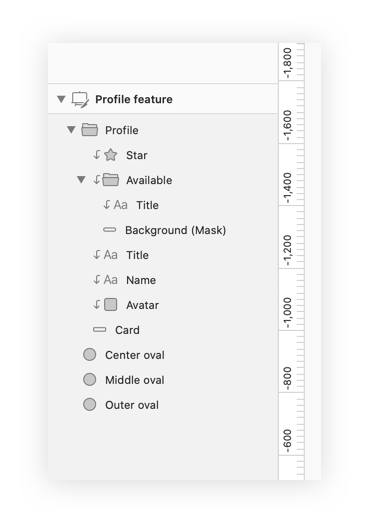
Take a look at the file. Pretty o r ganised, huh? Anyone who has ever had the misfortune of exploring one of my Sketch files knows that I don't often pay close attention to my layer hygiene, but here it's important.
As we migrate our design across to XD and over to After Effects, it's really easy to lose track of layers and become confused by the way each application handles grouping. The easiest way to avoid all of that confusion is simply to tidy up our sketch file before we begin.
A couple of best practice guidelines to observe here;
- Name all of your layers and remove any unnecessary ones. The less layers we take forward, the better
- Be considerate of groups. Groups are great, but beware they cannot be easily ungrouped once we move into Adobe After Effects
- Take stock of any unusual layer settings (e.g. multiple drop shadows)
- Center your artwork on a HD (1920x1080) or 4k canvas (3840x2160)
3. Convert our Sketch design into an XD design
In order to animate our design, we're going to need access to the various layers, groups and masks we setup in the original sketch file.
It turns out that this is easier than it sounds. Adobe have created two fantastic integrations that make doing this pretty straightforward.
- XD natively loads Sketch files, with a bloody good degree of accuracy too in my experience
- XD integrates seamlessly with After effects
Simply open up the Sketch file directly from XD and make a quick pass over the design to make sure everything looks ship shape. On closer inspection of my Sketch file I noticed that XD doesn't support multiple drop shadows. No matter, they can be re-added in After Effects later.
In XD, select the artboard, then hit File > Export > Export to After Effects
If you haven't already kicked up a new After Effects project, XD will create you one and import the design as a composition.
4. Animate, animate, animate
Opening the newly created composition, you will find that all the layers of the design have been preserved. You can now make use of all of the after effects effects and keyframe manipulators to create really awesome animations.
For a step by step guide on animating this sequence, follow the video walkthrough below.
Enjoyed this tutorial? Post a comment and share your design success!
Happy sketching!
How To Make Animated Video Of Ui Design
Source: https://uxdesign.cc/bringing-ui-designs-to-life-with-animation-adobe-xd-after-effects-2fe3c7f402d8
Posted by: herreralefterim.blogspot.com
0 Response to "How To Make Animated Video Of Ui Design"
Post a Comment