

Interactive 3d Model In Html5
How to embed an interactive 3D model on a web page
Thanks to the HTML5 standard nowadays it is possible to visualize 2D and 3D vector graphics in any web browser and in any device without the need of plugins
![]()
In this tutorial we are going to learn how to embed an interactive 3D model made with a free online CAD application in a web page using IFRAME elements. If the destination media doesn't allow embeds you can always use an image linked to the drawing as the picture at the beginning of this article.
The selected application is LAI4D because it is completely free, it is available online, does not require registration and it is easy to learn for inexperienced users. LAI4D provides a powerful web 3D viewer widget that can be embedded through an IFRAME element in a similar way to a Google Map.
- The 3D model:
As a CAD application, LAI4D allows to design your own 3D model based on lines, surfaces or even algorithms, and allows to save it in the cloud (see the design tutorial). But this tutorial is only about embedding so we are going to choose an already existing drawing from the ones available at www.lai4d.org. Open that page and go to the "CAD EXAMPLES" section. - Opening a 3D drawing in the browser:
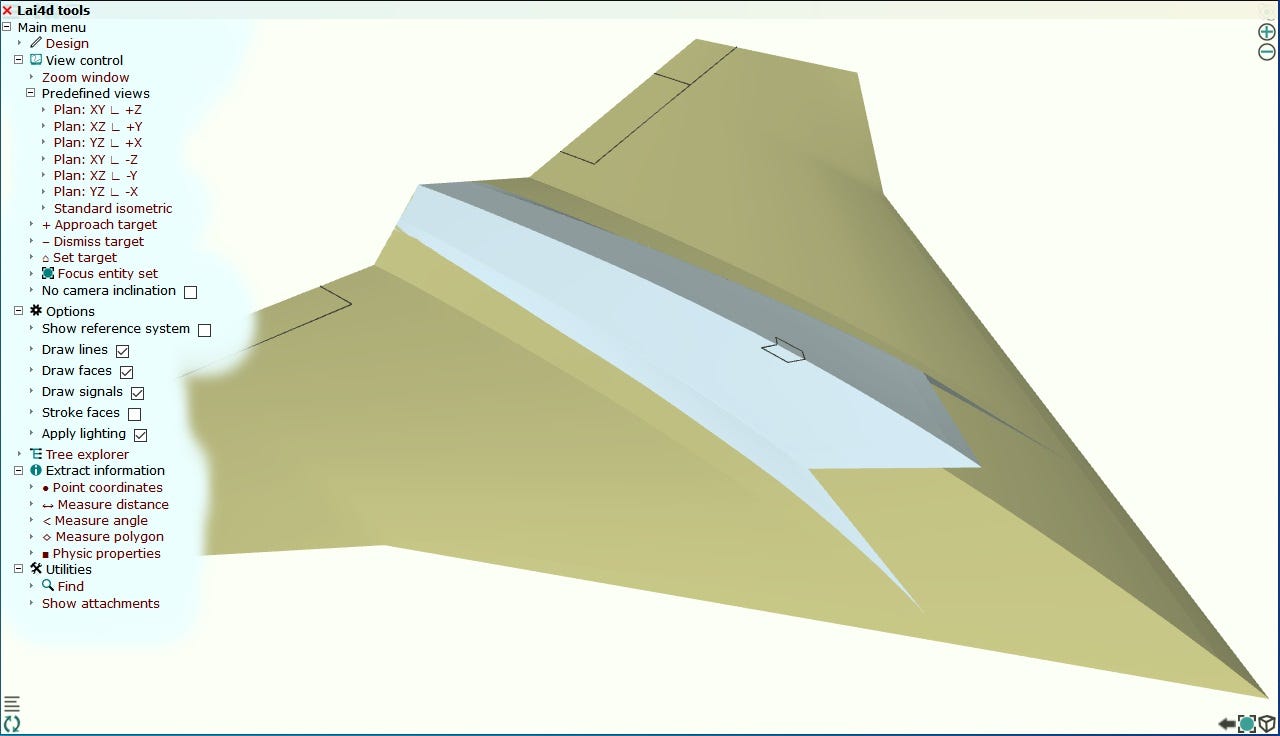
The first sample drawing is a paper airplane which is very simple and light so click on the corresponding image link to open the drawing. You can also directly type in the address bar the URL "http://widget.lai4d.org/lai4d_viewer.html?{{file}{artwork/paperairplane.txt}}". - The LAI4D viewer widget:
What you see in the new browser window is the LAI4D viewer showing the opened 3D model. The viewer widget is itself an HTML page with a lot of programming, just as the designer widget that we are not going to use. If you move the mouse over the screen (or touch the touch-screen) the widget shows a series of button groups at the corners containing the main UI controls. The functions of most of those buttons are very intuitive, try them if you want (it is only a viewer therefore you can't break anything). - The reference system:
Although it is not necessary, it may be useful to see how the XYZ axes are arranged. Press the menu button at the top-left corner. Expand the "Options" group. Mark the "Show reference system" checkbox. The reference system will be shown near the bottom-right corner of the window. - Configuring a view:
If you drag the mouse over the screen (or the finger over the touch-screen) the camera orientation changes. How that orientation changes depends on the "Camera mode" button at the top-right corner. The "⊕" and "⊖" buttons also at the top-right corner control the zoom. You can click them for a stepped zooming or maintain them pressed for a continuous zoom change. Use these functions until the view configuration is the desired one. - Get the HTML code for sharing the 3D model:
At the top-left corner click on the "Share" button. This will open a small window whose purpose is facilitating the generation of the URL for sharing the drawing using a simple HTML link that can be mailed, or an IFRAME element that can be embedded in a web page. - Customizing the HTML code:
The source code shown by default is valid but we want to share the drawing with our customized view configuration so mark the "Use options" checkbox. Then mark the "Include current view definition" checkbox. The application automatically adds the IFRAME's attributes of "width" and "height" that you can customize or remove. Now the IFRAME code is the one we want and can be copy-pasted into the source code of our HTML page.
Examples
Example of a complete HTML web page: This could be an example of the final HTML source code setting the "frameborder" attribute to 1 and the IFRAME's size to 400×250:
            <!DOCTYPE html>
<html>
<head>
<meta content="text/html; charset=windows-1252" http-equiv="content-type">
<title>LAI4D embedding sample</title>
</head>
<body>This is my 3D model:<br>
<iframe scrolling="no" marginheight="0" marginwidth="0" src="http://widget.lai4d.org/lai4d_viewer.html?{{file}{artwork/paperairplane.txt}{view}{{type}{view}{projection}{perspective}{orientation}{{-150.3928346772768}{55.17696308158675}{1.0628542788904753}}{point}{{-6.009874707412184}{13.949199877915973}{6.881229197957248}}{zoom}{28.783202793841753}{target}{-13.17790536162189}{far light direction}{{1}{-1}{-3}}{far light factor}{0.7}}}" width="400" height="250" frameborder="1"></iframe>
</body>
</html>
This example shows an HTML page with the LAI4D widget embedded in an IFRAME. The HTML defines a background image which can be seen because the widget is transparent.

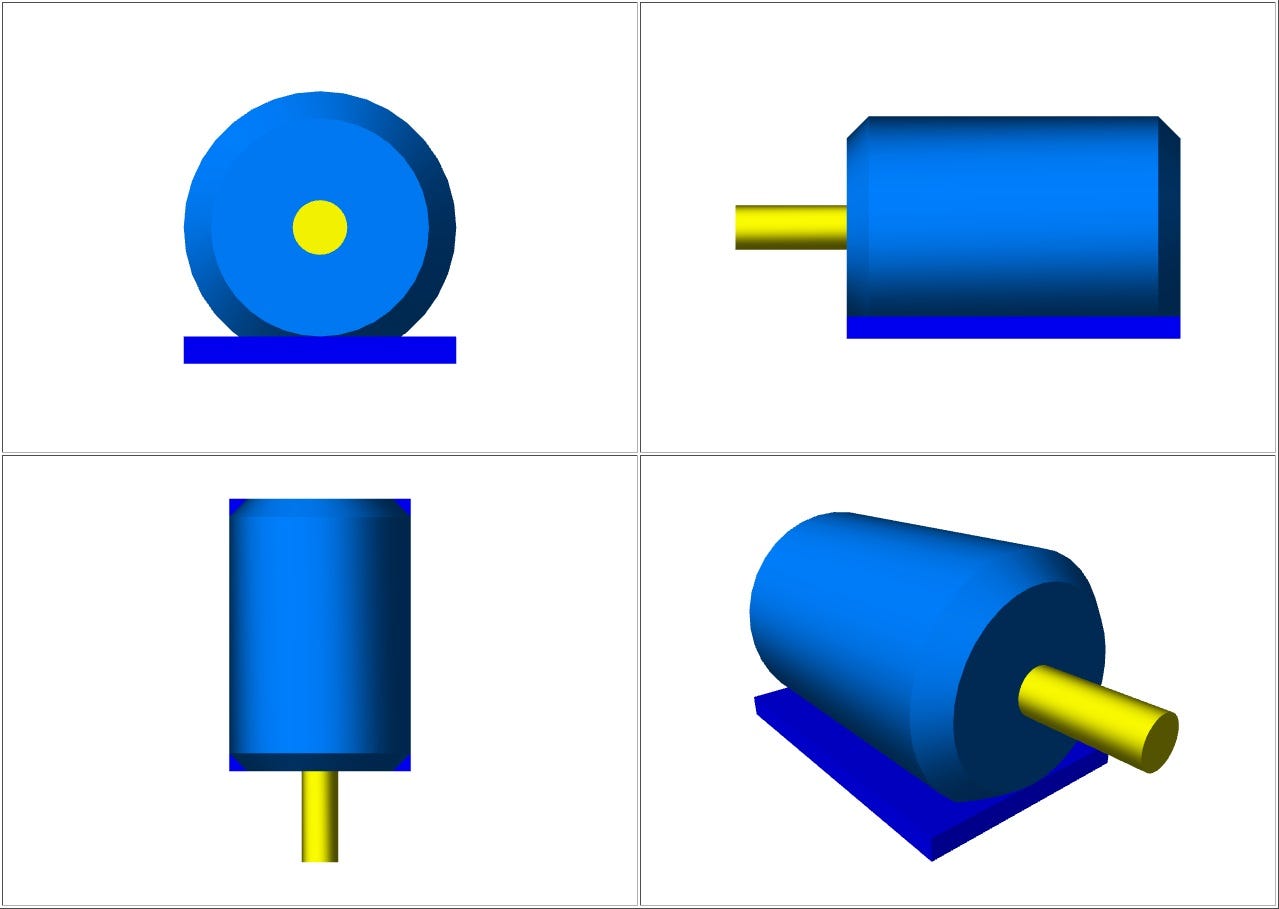
This other example shows an HTML page with 4 views of a device. The HTML contains a table with 4 cells. Each cell contains a LAI4D widget embedded in an IFRAME with a customized URL.
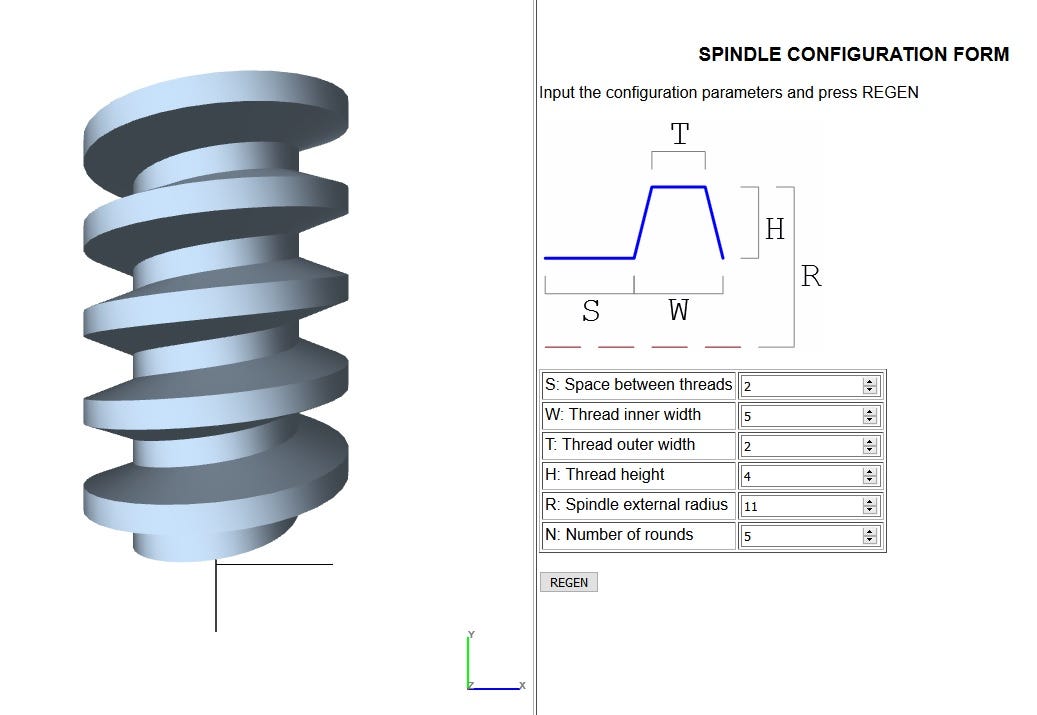
This is a more elaborated example integrating a JS function. It shows an HTML page with an IFRAME at the left and a web form at the right. The form allows to configure several parameters which define the geometry of a mechanic spindle. The button "REGEN" takes all parameters and generates a new URL for the IFRAME in order to paint the expected spindle.
 F Find all the information you need in the LAI4D´s Reference manual.

Interactive 3d Model In Html5
Source: https://medium.com/lai4d/how-to-embed-an-interactive-3d-model-on-a-web-page-9bd631046927
Posted by: herreralefterim.blogspot.com
0 Response to "Interactive 3d Model In Html5"
Post a Comment